Saturday, November 29, 2008

Christmas and Thanksgiving Cards

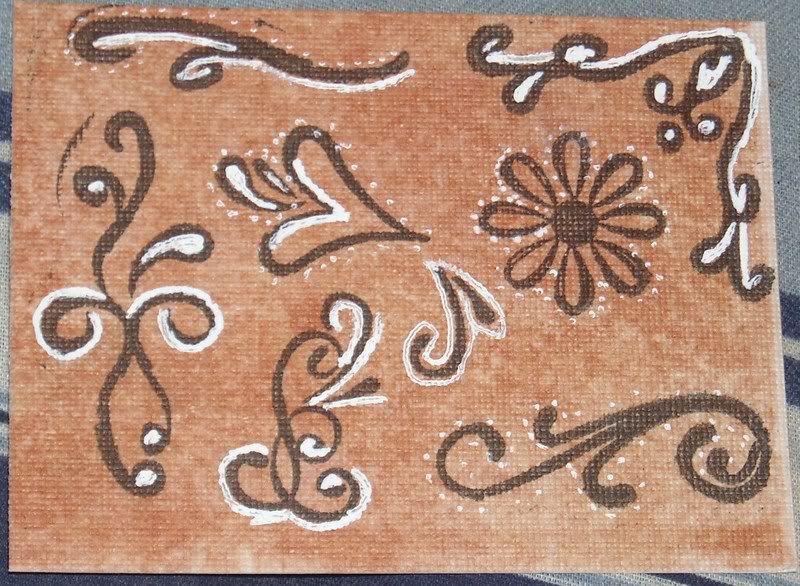
This is only my second attempt at heat embossing, but I was quite happy with my results. I'm sure with more practice, it'll get better. I got this idea from Split Coast Stampers
That is a great website for anyone who needs inspiration (like me!!)
Supplies:
Stamps: Baroque Motifs, Acrylic stamp from Wal-Mart
Ink: Versamark, Purely Pomengranate and Kiwi Kiss
Paper: Purely Pomengranate, Whisper White and Green
Other: Making Memories Eyelet, CM Tape Runner and Gold String, Marvy Heat Embosser, Glitter Pal Tray
Technique: Heat Embossing

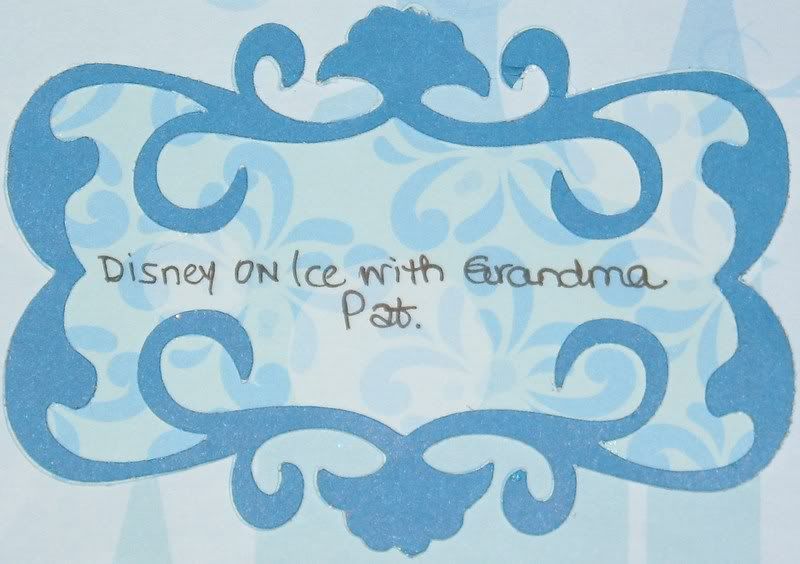
This is a card that I made for my mother in law for Thanksgiving, but I liked it so much, I never gave it to her. This is an interpretation of one I saw on SCS.
I cased it and I can remember who originally made it, I would give her credit.
Supplies:
Stamps: Baroque Motifs (I love this stamp set!!)
Ink: Creamy Caramel
Paper: Creamy Caramel, More Mustard and Ruby Red
Other: Chocolate Chip Ribbon, Earth Elements Creamy Cocoa Button, Twine, Felt Leaf from Michaels, Silver SU! Brad
Technique: Tearing

This was a totally simple card!! Compared to the top two, this took about five minutes. The base is Chocolate Chip and the top is pumpkin pie!! Isn't this a great fall card? It reminds me of pumpkin pie, or maybe Sweet Potato.
Supplies:
Stamps: All Holidays
Paper: Chocolate Chip, Whisper White and Pumpkin Pie
Ink: Chocolate Chip
Other: Chocolate Chip ribbon, Glitter leaves from Michaels, CM Tape Runner.


Wednesday, October 15, 2008

Some more scrapbook pages.....


Albemarle Fair: The titles were made using the Cuttin' Up cart and the banner feature. I then cut out the overlying letters using the Holy Cow font on Cuttin' Up cart, weaved some orange ribbon through it and affixed with popdots.
Bandana: This is a new technique that I learned from Candie. She took a bunch of acrylic stamps from the $1.00 section at Michaels, mounted them onto a acrylic block and them inked them with black ink. After stamping it on paper, it was embellished with a white gel pen in the style of a bandana.
Storybook Cart: A sampling of the storybook cart. I LOVE IT!! Terri has it and it's great. This was just used as a journaling box. I have more things done with this cart that I will be posting soon.

Monday, October 13, 2008

Some scrapbook pages.........

Slide Pages: made using the Locker Talk cart for the slide. The title is Doodletype. I used On Board Essentials from Stampin Up for the corners and sun. The purple ones are Alcohol ink and the yellow ones are Yoyo Yellow from Stampin' Up with clear stickles.
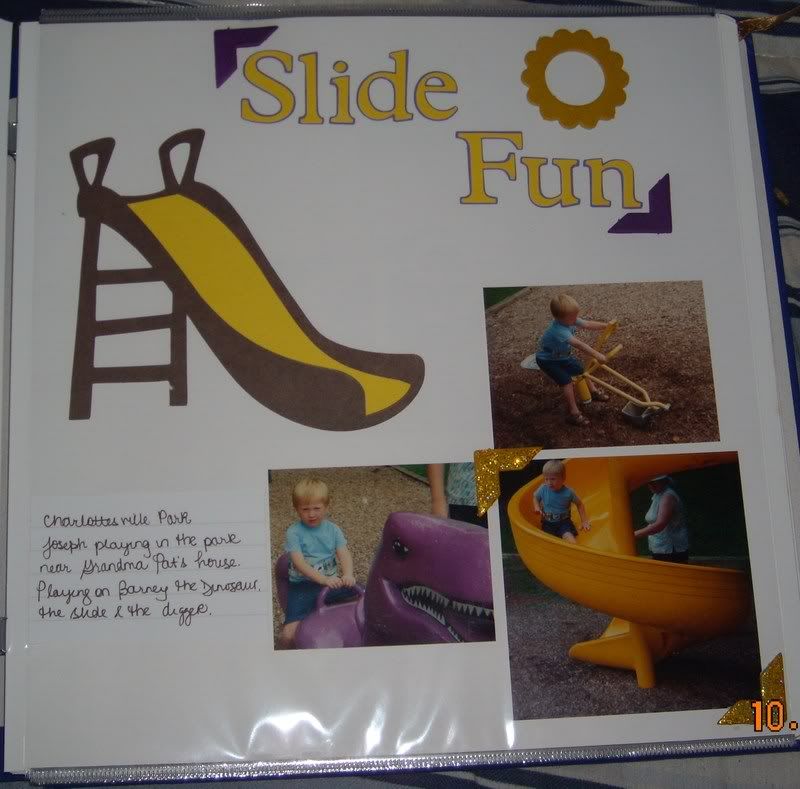
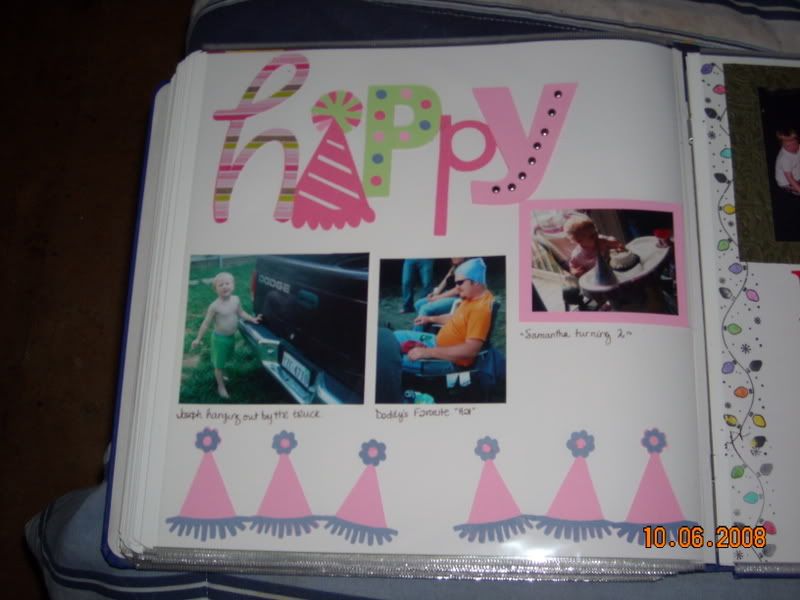
The Happy is from the Celebrations cart. I just used several different pieces of paper to make the cut. I then used some silver brads from Stampin' Up to embellish the "Y". The border is also from Celebration and it is the Birthday hat using the border feature.


Scooby Doo: Scooby was done using some green paper that I had from CM: Shades of Green Paper pack. The letters are Doodletype. The ghosts came from the CM Halloween Trimmer and the ghost paper is DCWV Fall Glitter pack. I then used some stickers from Michaels.


These pages were made using CM paper on the left as a base, and Target paper on the left.
I then cut two fireplaces from the Joys of the Season cartridge that goes with the Cricut in light tan.
I then used my chalks and a makeup applicator and applied a light tan chalk, followed by a medium tan and dark tan and mixed them all together. I applied black to the top part to make it look darker so that it looks like an overhang. I then cut out the layer piece for the fireplace and chalked it with red. I then took a white pen and drew lines to make it look like bricks.

Monday, October 6, 2008

Some cards I made.


Halloween Card--this idea came from a Stampin' Up rep named Karen that I met this weekend.


This was a fun card to make. The background paper is Stampin' Up Pumpkin cardstock as well as the pumpkin. The fence is double cut, first with card board and the second with Green SU Cardstock. The hat stamp is new to Stampin' Up this season and was double stamped and then mounted with popdots to add dimension. The face on the pumpkin was stamped with a new set of stamps, also from stampin up. This card took longer than some of the other ones because it was detailed.


This is a cute little card that Candie showed me how to make. The front is watercolor paper that had the image of a cardinal stamped on it. We then took watercolor pencils and colored the image in and then took a blender pen and blended it all together. This is a small card as you can see from the second image, but it's so cute! The pocket was made by cutting that square in half and then taping the inside. The stamp is a stampin up holiday stamp on top of white paper and red paper. I suggest folding the top part of the teabag enough that it fits inside the card. This was a super fast card that requires little skill. It was also totally a great idea. Thanks Candie!! The inside has a computer printed verse that reads:


On Christmas Day


At Half past three


Make yourself a cup of tea


I'll think of you


You'll think of me


Sitting around the Christmas Tree


Enjoying our lovely cup of tea.


This is a super easy card. We just stamped a picture of a snowman, colored the hat, the nose and the scarf, glued it and put some ribbon through.


Monday, September 29, 2008

Scraps n Wraps

Heather from Scraps N Wraps is giving away free blog candy everyday for a week.
Go here to see her blog.
Thanks Heather for the oppurtunity to win some blog candy.

Monday, August 25, 2008

Some new pages


Now that the squad scrapbook is done, I've had the oppurtunity to get some baby girl pages done. These are my favorite kind of pages, with pictures of my babies on them.

"Playtime" done with the Mod Power Palette from Creative Memories. The title was done in Doodletype on my Cricut, this page took about ten minutes using the Power Palette layout. I've never used these before but need to start using them more because they are great, and quick!!

"Swing Time" done with paper from the Blossoms paper pack that was distributed by CM for a limited time. The butterfly ribbon is from Michaels, the Ric Rac is a Target special and the other fiber is that furry yarn that they sell in Michaels. The butterflies are vellum stickers and the title is again the Doodletype font from Cricut.

"Hello Kitty Party" done with the Hello Kitty paper pack from Michaels. This was a pretty simple page as well. I had all the elements and just had to throw all the pieces together. I love Hello Kitty and now my little girl does as well.

"Other Birthday Party" since I have two parties every year for both of my kids, I have two birthday pages. This pages was made with Striped Paper bought from Target and corresponding Gingham ribbon, I then used some left over paper from the Hello Kitty pack to mat the photos. The flowers are Imaginisce with some bling and buttons added for good measure and a Stampin' Up stamp in Rose Red. The stamp was outlined in Lemon Drop Stickles.

I've added some more photos to show the details.

Wednesday, August 20, 2008

Finally done!

I am finally done the first squad scrapbook. I mailed it yesterday!! I will find out in about a month if I placed in the competition and if I win first place. I get a really big trophy! I will start working on the next one in a few months. For now, my only scrappin' is going to be my babies and maybe some cards. I'm planning four days worth of scrappin' in September and can't wait!!

Thursday, August 14, 2008

Baby Pages

Baby girls pages. These pages could be considered neutral because of the colors used, but my baby girl is in the pic so that's why I'm calling them baby girl pages. The "Summer Fun" title was from the Summer Snap Pack made by CM. The die cuts and stickers are also from the same pack. The paper is from "Shades of Yellow and Orange" paper packs. Skittles (which are really Panaceas Beads sold in the flower section of Michaels) were used to accent the sun. The bottom of the page is a stamp. This is my first foray into stamping the bottom of a page. This is the Daisy Dash Roller from Stampin Up with Yoyo Yellow ink.


I have never met a little girl who likes Broccoli and Cheese more than my little Abbi. The border is made from CM "Shades of Green Paper Pack, Perfect Fit Yellow and Orange Paper pack." I cut the squares out with my CM Square cutter and used my MM Quick Setter to place the brads on the squares. The stickers are from CM and came in a baby pack. I love the look on Abbi's face and these color combinations remind me of Broccoli and Cheese.


This is my water baby page. The background paper is water paper from the "Perfect Fit Blue" paper pack from CM.I used the CM wavy cutter to make the "waves" and my CM square cutter to make the border along with some blue vellum to make the ribbons. The frame was made using the CM Frame Cutter and the journaling box that came with the paper pack.


Up close of the "Daisy Dash Wheel."

Wild Color Combinations

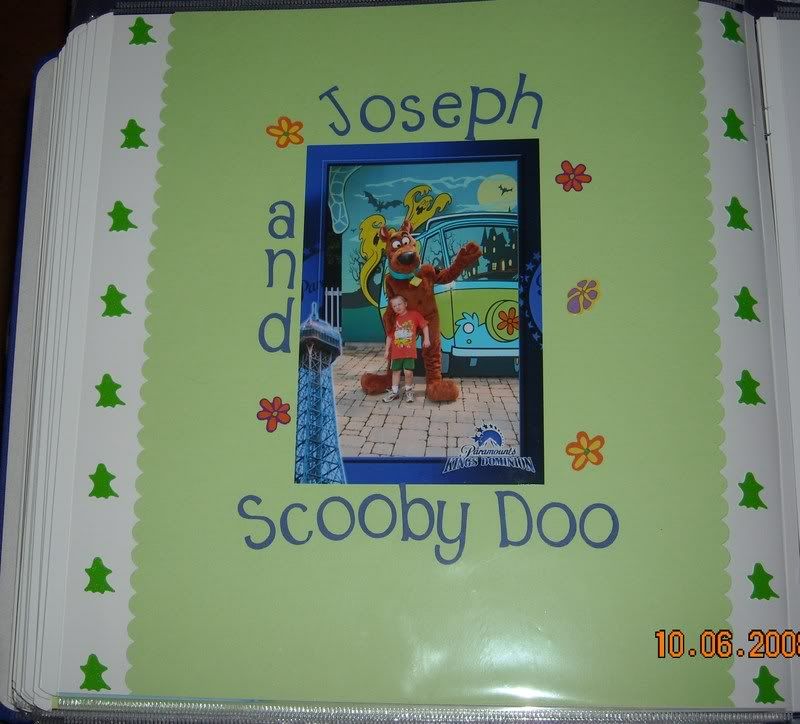
These are some more pages that I made for the Rescue Squad scrapbook. They are quite bright and are great examples of color combinations. Thanks for help from Terri and Chris for their wonderful input and color suggestions (since as I've previously mentioned, I'm color coordinating retarded).

This is the layout that I made for the 4th of July parade in Beaverdam. The background is stars paper that I bought in a pack from Target. They have a great dollar seletion. All of the photo mats are polka dot paper. The letters are made from shiny paper that came with the stars paper and the polka dot paper. I again made my own journaling box using the ruled paper. The blue shiny border is large ribbon purchased from my LSS. The small red border is also ribbon that I got in a group from Target as well. This other page was made using all orange paper. The words were done using "Base Camp" and the paper is called "Martini". The ribbon that is going across the front was also bought in a pack that came from Target. The accents that go on the journaling box and the picture was done in orange paper with lime green dots. The accent was cut with "Accent Essentials." I then outlined the accent with a black pen. The little dots in the corner of the journalnig box are a cool element called "Rain Dots". I love these colorful pages!!


Sunday, August 10, 2008

Some scrapbook pages

These are my favorite type of layouts: Multi-picture, two page layouts. I love packing as many pics onto one page as I can. Mainly, because I don't have to make so many pages. The first one "Competition" was made using CM papers, Base Camp font from the Cricut Machine, Imaginesce Flowers and Bling and buttons that I purchased at Wal-Mart. The brads are Stampin' Up Bronze brads. I also used a new punch that I got on sale at Michaels. So far I love IT! The next two pages are about the "EMS Symposium" and were made using the Cuttin' Up cart from the Cricut and the Stars Shape Cutters from CM. The brads are from Memory Makers and the top was made by using s slot cutter and weaving the ribbon through. The paper is CM and from the "Shades Of....." paper pack. The ribbon is gauzy and accented with Petaloo Flowers. The arrows are an awesome addition and came from the Accent Essentials Cart. The "Banquet Dinner" page was made using the "Graduation Paper pack" from CM and the Metals Paper from CM. I also used the Paisley Cutter with the Vellum paper and the GOld paper and used a brad to make it into a flower. I also used the Cuttlekids dies to make the font. Joint training was done with REALLY BRIGHT paper from Target that was in the dollar rack. I also used a new Cuttlebug die to make the accents and my "orange peel" stickles to accent them. (Which I think are my new favorite craft tool).


Friday, August 8, 2008

My Beautiful Baby Girl


My beautiful baby girl! I'm proud of myself for takign this great picture of my little troublemaker. At age 2, she's a precocious little girl who enjoys life to the fullest. There is never a dull moment in our house because of this little firecracker. I can't wait to see what she blooms into.

Sunday, August 3, 2008

New Stuff added

So I added a lot of new pics today. I also some of my favorite sites, that I will be updating periodically. I love www.scraptime.ca. It's a great site and there is show that you can download from her site or on iTunes (for FREE!!) that shows a ton of great tips,products and everything else. I've watched ever episode so far and have tried a few of her tips. Go there and try it.

I also love my Cricut, as I've previously mentioned. There are some great new products coming out that I can't wait to try. I'm going to be making some more products soon that I can hopefully put up.

Letters


I am involved in a swap where I need to make a certain amount of letters that will then combine to make some words. This is a new area of crafting for me as I usually just use Sticker letters or cut them with my Cricut. These letters were made using Chipboard that was purchased at Michaels and marketed by Making Memories. I used Alcohol Inks (which by the way, don't hold them too close to your nose, 'cause you will get high), Stickles and some mini stamping pads. I also used some bling on one of them. I'm trying to think of another way to embellish them since they have to be embellished three times, but I"m stuck.

Winnie the Pooh without the Winnie


I am working on a cover for a scrapbook that I am making for a rescue squad competition. The theme is "Stepping Stones". I've never made a cover for a scrapbook before and had to think about the topic for a very long time.


This was made by my Cricut using the Pooh and Friends Cart.

The base paper was cardstock that was purchased from Michaels. The top paper was a shiny paper that looked like lineolum and had leaves on it. The "grass" is actually grass paper also purchased from Michaels, the dirt is Mulberry paper and the water is the "pool" paper. This was cut at 5 1/2. This is the first time that I've used Mulberry paper and after getting it to work correctly on my Cricut, it cut pretty well.


The second part of the layout is a log I also made using the Pooh and Friends cart, using the "Lineolum" and Mulberry paper. The mulberry paper is double sided so I just flipped it over to use the darker side.


The letters are Plantin Schoolbook. They came from a RAK that I'm a member of and I think that they correspond well with the colors in the Bridge. The other letters are Orange because Orange and Blue are our "colors" for the squad.


Let me know what you think.

Saturday, August 2, 2008

Doodletype Card


This is the first card that I ever made. It was my Mother's card for Mother's day. It's very simple (as I try to be as simple as possible). The base is Stampin Up Khaki paper, SU Wild Wasabi Ribbon, SU Felt Flowers with an SU brad and a pop dot holding it on and "Grama" from the Doodletype Cart, also in Wild Wasabi. It's very simple and very plain but my Mother loved it.

I don't think it was that bad for a "first time". Definitely looks better than my first scrapbook page.

Nikki's Card


My little Niece Nicole is a Princess Fanatic! Her favorite one is Ariel (and apparently Jasmine, Mulan, Aurora and Belle). Using my Cricut (the greatest scrapbooking machine ever made!! EVER!) the Happily Ever After Cart, the Celebrations Cart and Doodletype Cart and a ton of paper (the only downside to making the Princesses) I am finished my Ariel Masterpiece. This is the first princess that I've ever made using my Cricut. I didn't realize how much work goes into making them and now realize why some people are unwilling to RAK them. So Ariel is made from CM paper (that whole obligation thing) and because I'm scrapbooking impaired, I used Stickles for the eyes because I couldn't get those darn things to work. I also decided to use some stickles on the shell in her hair. The bling in the corner is Memories Galore and is from Michaels. On the inside cover is "It's Your Day" and was done with Cricut paper that corresponds to the Celebration cart and then Shadowed in Pink. The paper says Happy Birthday and was done at 3". On the other side is "Happy Birthday" that was done with Doodletype. Happy Birthday happens to be one of the preprogrammed words in DT and it happened to work wonderfully for me. The border (which is one of the main reasons I bought both the Princess carts) is the border that corresponds to Ariel with a shell, the seaweed and the flowers that was pieced together. As I'm not very creative (nor color coordinated) I just used the colors that the book showed. I then affixed everything using the CM Precision Adhesive. I hope that my little niece likes it. I will find out tomorrow after I give it to her.

Buzz and Woody


Buzz Lightyear and Woody:

The background is CM Groovy Paper from the Groovy Paper Pack. The border is 12x12 and accented with the 1" square and 1" circle punch as well as a piece cut with the Wavy cutter. The mats are hand cut with CM paper. The stickers are EA and were bought at Michaels.